Maplace download
We're going to use a combination of HTML, CSS and jQuery to make custom Google Maps.
In particular, we're going to use a jQuery "plug-in" library called Maplace. More on jQuery plugins; here's a repository of plugins for you to peruse.) Maplace provides a very simple interface for adding "pins" to Google Maps. When a reader clicks on a pin, a little pop-up appears with custom HTML that you've specified beforehand.
I'm going to show you the simplest and easiest way to do this! Again, we're going to be seeing some strange Javascript syntax that you haven't seen before, and I'm not going to explain what the code actually means---just how you can add to it and modify it.
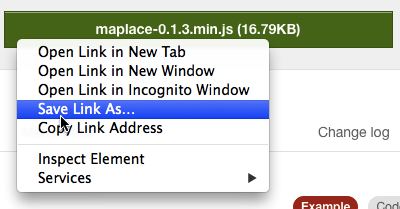
The first thing you need to do is download the Maplace Javascript file. To do so: Go to http://maplacejs.com. The file you want is maplace-0.1.3.min.js (the exact numbers in the filename might be different by the time you read this). You want to download that file and put it in the same folder as all of your HTML and CSS files.
Here's the easy way to do that. Ctrl+click (or right-click) on the link to maplace-0.1.3.min.js and select Save Link As... like so:
Maplace download
(The exact wording of Save Link As... might be different if you're using a browser other than Chrome.) In the window that appears, find the directory where you've been keeping all of your HTML and CSS files, then click "Save."
You now have a copy of the Maplace plugin. You'll need to upload this file to the server whenever you use it in a project---it'll need to be in the same folder on the server as the rest of your files.
After you've downloaded the Maplace Javascript file, you can make a simple HTML page that shows a Google Maps map embedded in it with the following boilerplate code. (Just cut and paste this into a text file.)
<!DOCTYPE html>
<html>
    <head>
        <meta charset="UTF-8">
        <title>Your Title Here</title>
        <script src="http://maps.google.com/maps/api/js?sensor=false&libraries=geometry&v=3.7"></script>
        <script src="http://code.jquery.com/jquery-2.1.1.min.js"></script>
        <script src="maplace-0.1.3.min.js"></script>
    </head>
    <body>
        <div id="gmap" style="width: 480px; height: 320px;"></div>
        <script type="text/javascript">
$(function() {
    var locationsList = [
        {
            lat: 40.770265,
            lon: -73.984436,
            title: "A cool place to hang out",
            html: "All the <em>cool kids</em> hang out here.",
            icon: "http://placebear.com/25/25"
        }
    ];
    new Maplace({
        locations: locationsList,
        controls_on_map: true
    }).Load();
});
        </script>
    </body>
</html>
You should end up with a page that looks like this:
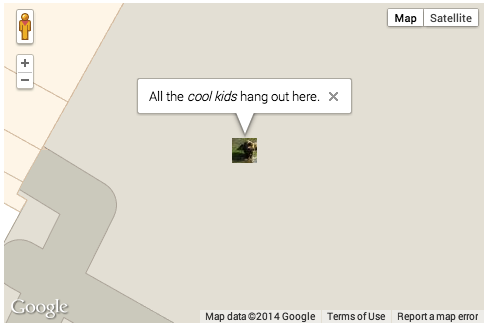
Maplace test!
Here's the most important lines of that same code, this time with the parts you can change highlighted:
  <div id="gmap" style="width: 480px; height: 320px;"></div>
  <script type="text/javascript">
$(function() {
    var locationsList = [
        {
            lat: 40.770265,
            lon: -73.984436,
            title: "A cool place to hang out",
            html: "All the <em>cool kids</em> hang out here.",
            icon: "http://placebear.com/25/25"
        }
    ];
    new Maplace({
        locations: locationsList,
        controls_on_map: true
    }).Load();
});
Be careful to keep the rest of the code exactly the same! Here's what will happen when you change any of the parts in bold:
480px and 320px: changing these will change the size of the Google Maps <div> tag on the page.40.770265 and -73.984436 are the latitude and longitude (respectively) of the pin. Changing these changes the location where the pin will be shown on the map. (We'll talk about how to find latitudes and longitudes of places in a second.)A cool place to hang out is the "title" of the pin---this changes what gets shown on the menu of places when you use more than one pin. (We'll talk more about this below.)All the <em>cool</em> kids hang out here. This is the HTML that shows up when you click on the pin (in the little window that pops up).http://placebear.com/25/25: change this to the URL of the image that you want to show up as the "pin."To put a pin on the map, we need its latitude and longitude. (These are two numbers that can be used to locate any point on Earth's surface.) There are two easy ways to translate a street address in the U.S. to a latitude and longitude.
The first way is to use a "geocoding" service, like this one. First, enter the address of the place whose latitude and longitude you'd like to determine:
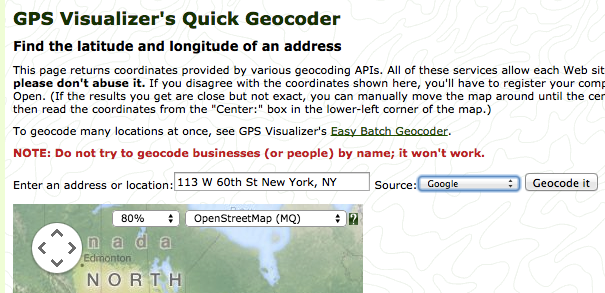
Geocoding input
Then click "Geocode." You'll see a list of matching places. Each item in that list has a latitude and longitude in it. I've highlighted these in the screen shot below.
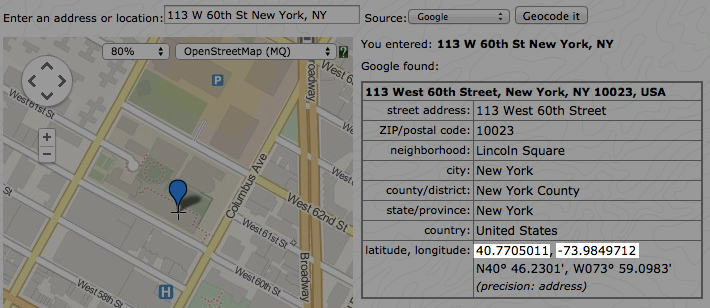
Geocoding: latitude and longitude
The first number is the latitude and the second is the longitude. You can take these numbers and cut-and-paste them into the Maplace boilerplate above.
You can also get the latitude and longitude of a place using Google Maps directly. Here's how to do so. Go to Google Maps and search for the place whose latitude/longitude you want to calculate (or move the map and zoom to find the place). When you've found it, right-click (or Ctrl+click) on the map and select "What's here?" In the area above, you'll see a description of the place you just clicked on, along with a latitude and longitude for the place. Those are the numbers you'll want to select and copy into your boilerplate. The animation below demonstrates the process.
Getting a latitude/longitude from Google Maps
Having a map that just displays one location is hardly a story. What we'd like to be able to do is to add multiple locations to the map. This is a little bit tricky, but stick with me.
Take a look at the boilerplate above. There's a section of the boilerplate that looks like this:
var locationsList = [
    {
        lat: 40.770265,
        lon: -73.984436,
        title: "A cool place to hang out",
        html: "All the <em>cool kids</em> hang out here.",
        icon: "http://placebear.com/25/25"
    }
];
This little bit of code is what's known in Javascript as a "list of objects." The list starts with [ and ends with ]. Right now there's just one "object" in the list---it starts with { and ends with }, and has a number of "properties" inside of it. (If you're thinking to yourself: "Wow, that looks like a CSS rule!" you're not far off the mark! They do look similar. But they're not the same thing, and they have slightly different rules that govern their syntax.)
What we want to do is to add another object to the list. Here's the easy way to do it: just copy the lines from the opening { to the closing } and paste them directly below, like so:
var locationsList = [
    {
        lat: 40.770265,
        lon: -73.984436,
        title: "A cool place to hang out",
        html: "All the <em>cool kids</em> hang out here.",
        icon: "http://placebear.com/25/25"
    }
    {
        lat: 40.770265,
        lon: -73.984436,
        title: "A cool place to hang out",
        html: "All the <em>cool kids</em> hang out here.",
        icon: "http://placebear.com/25/25"
    }
];
Now---and this is important---put a comma right after the first }:
var locationsList = [
    {
        lat: 40.770265,
        lon: -73.984436,
        title: "A cool place to hang out",
        html: "All the <em>cool kids</em> hang out here.",
        icon: "http://placebear.com/25/25"
    },
    {
        lat: 40.770265,
        lon: -73.984436,
        title: "A cool place to hang out",
        html: "All the <em>cool kids</em> hang out here.",
        icon: "http://placebear.com/25/25"
    }
];
Make some modifications to the copy so it doesn't have exactly the same information:
var locationsList = [
    {
        lat: 40.770265,
        lon: -73.984436,
        title: "A cool place to hang out",
        html: "All the <em>cool kids</em> hang out here.",
        icon: "http://placebear.com/25/25"
    },
    {
        lat: 40.7682479,
        lon: -73.985727,
        title: "An even cooler place to hang out",
        html: "But all the <em>really</em> cool kids hang out here.",
        icon: "http://placebear.com/26/26"
    }
];
Now your map should look like this:
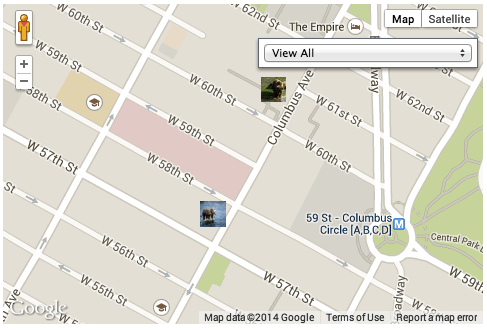
Map with two pins!
Notice what changed:
To add a third (and a fourth, and a fifth, etc.) pin, simply repeat the process above. Copy an existing object (from the { down to the }), add it to the list (inside the [ and the ]), then modify the copy to have whatever information you want. Make sure that there are commas between each object (i.e., after the }s), but also make sure that there's no comma after the last object. Here's a new list, now with three locations:
var locationsList = [
    {
        lat: 40.770265,
        lon: -73.984436,
        title: "A cool place to hang out",
        html: "All the <em>cool kids</em> hang out here.",
        icon: "http://placebear.com/25/25"
    },
    {
        lat: 40.7682479,
        lon: -73.985727,
        title: "An even cooler place to hang out",
        html: "But all the <em>really</em> cool kids hang out here.",
        icon: "http://placebear.com/26/26"
    },
    {
        lat: 40.7710093,
        lon: -73.9817091
        title: "Let's go see a movie.",
        html: "At Lincoln Plaza Cinema(tm)",
        icon: "http://placebear.com/24/24"
    }
];
And here's what it looks like!
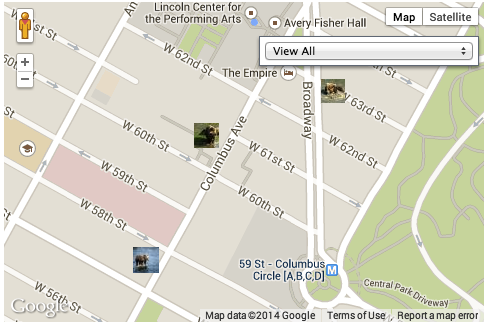
Three pins!
You've got a framework. Now it's up to you to breathe life and creativity into it. Some ideas: